

5 tips for spring cleaning your industrial workbench
23.4.2021Spring-cleaning is a must do chore in most households. We at Treston propose spring-cleaning also for industrial workshops to reduce workplace safety risks and increase productivity by keeping a clutter-free and clean workbench. Here is everything you need to know about spring-cleaning your workbench.
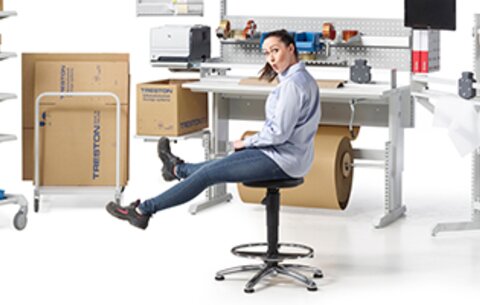
Many of us have experienced it – working on a bench that is cluttered, unorganized with tools and components here and there and having virtually no space on the bench to actually do the work I am supposed to do. Work is easily interrupted, as you need to repeatedly search for correct tools and parts, which in turn affects productivity negatively. You might even be grumpy before your shift even starts, when you know that a messy workbench awaits you.
Here is a free cleaning checklist every industrial worker and workshop supervisor should copy and use to check, not only in springtime but also regularly, that workbenches in use are clean, well-organised, safe and a joy to work in. After all, it is a well-known fact that employees who work in a clean, safe and pleasant environment are more energetic and productive and are more satisfied with their work.
Spring cleaning tips for industrial workbenches from Treston
1. Consider the function of your workspace
What are the work tasks actually carried out in this workspace? Do you have all the necessary components, tools and equipment ready within the workspace to carry out your tasks? Do you perhaps have tools or supplies in your workspace that you never use for your tasks? To determine which tools and supplies you need in your workspace, consider the function of that workspace and remove all the items that are not needed for carrying our those specific tasks. Only keep the items that are needed to complete the work tasks in that specific workspace.
2. Clear up your primary workspace (table top) and keep it clean for the actual work tasks
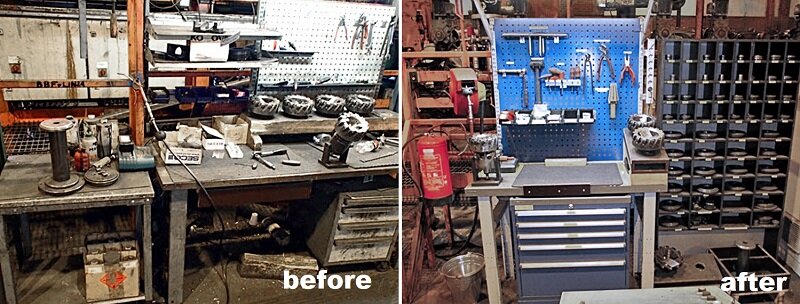
Workbench where the worktop is covered with junk, has inadequate storage, and tools spread all over the workplace is no fun to work in. Start by cleaning up the workbench. Remove all tools, supplies and components from the worktop and wipe it clean. Keep the worktop clean and free from tools and supplies and make it a habit not to stack and store things on your worktop. This way to worktop stays clean and clear for the actual work tasks.
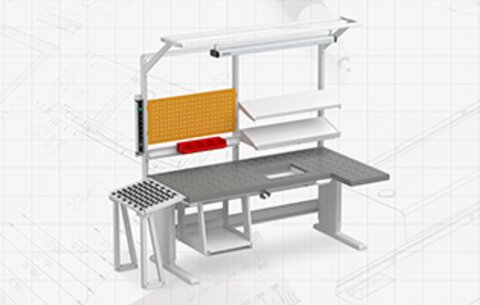
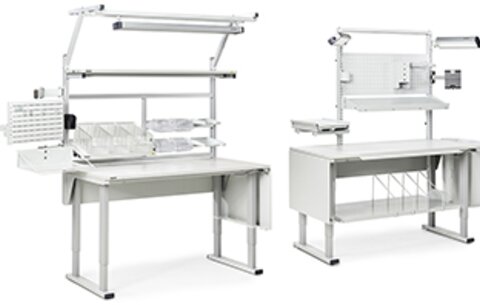
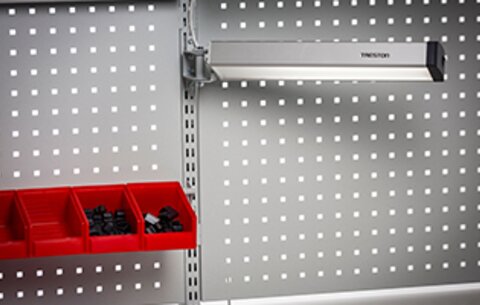
3. Utilise the space above, below and next to your workbench
Where should I now put all the tools and components I cleared away from my worktop? Utilise all the space above, below and next to your workbench. You can add drawer units and lower shelves below the worktop for storage space. Mount shelves, bin rails and bins, or perforated panels and tool hooks above your worktop to keep the most often used tools, equipment and components within reach and nearby. Add an easily movable trolley or cabinet next to your workbench as supplies storage.
Keeping your tools and components nearby will help you resist the urge to store them on your worktop. The more stuff you can keep away from the worktop, the freer you will feel, and the easier it will be to complete work tasks. The key to organization is using all the space available within the workspace.
4. Have a designated place for all items within the workspace – and put them back once done with them
Think what tools and components you use most often and place these nearby, within reach in the workbench. Make sure you have a designated place for all these items. This way it is easy and effortless for you to put the tools back in their place after you complete a task. Take tips from point 3 in utilizing all the space within your workspace to store the tools and components needed in that specific workspace.
As you are working, make it a point to not leave random things on your workbench, and instead just put them back where they belong. In general, if you make it a habit to put things away when you’re done with them, you can stop worrying about cluttering up your workbench, and taking up your valuable workspace.
5. Quick clean and organise your workbench after each shift
You do not need to clean your workbench inside and out after every shift. However, if you make it a habit to put away all the tools and components you used to complete your tasks and anything else that does not belong to the workbench after your shift, you soon understand how much nicer it is to start the next work shift in a workspace that is clear, clean, well-organized and safe.
Once you start to regularly declutter and have everything in its right place, you might even notice a difference within yourself. Your mind will probably be able to concentrate better, and you will be able to find things easily. More importantly, you have created a safer workspace for yourself.
Feel free to use, copy, distribute and develop this checklist.